Creating Evacuation Floor Plan For Your Office
)
For effective emergency preparedness, an Evacuation Floor Plan is indispensable. Emergencies can occur at any place, any time, at any circumstance. At any rate, a workplace fire can cause panic and get lethal quite quickly. Experience and research have proved that an educated workforce that has been trained for emergency evacuation and office emergency closing procedures are able to save lives and lower property damage.
Far too frequently, an emergency takes place and no one knows the way to react. Having an evacuation diagram (also known as fire evacuation diagrams, Evacuation map or plans) included in your fire emergency plan is not just a good idea, it's required by law to meet most local fire codes.
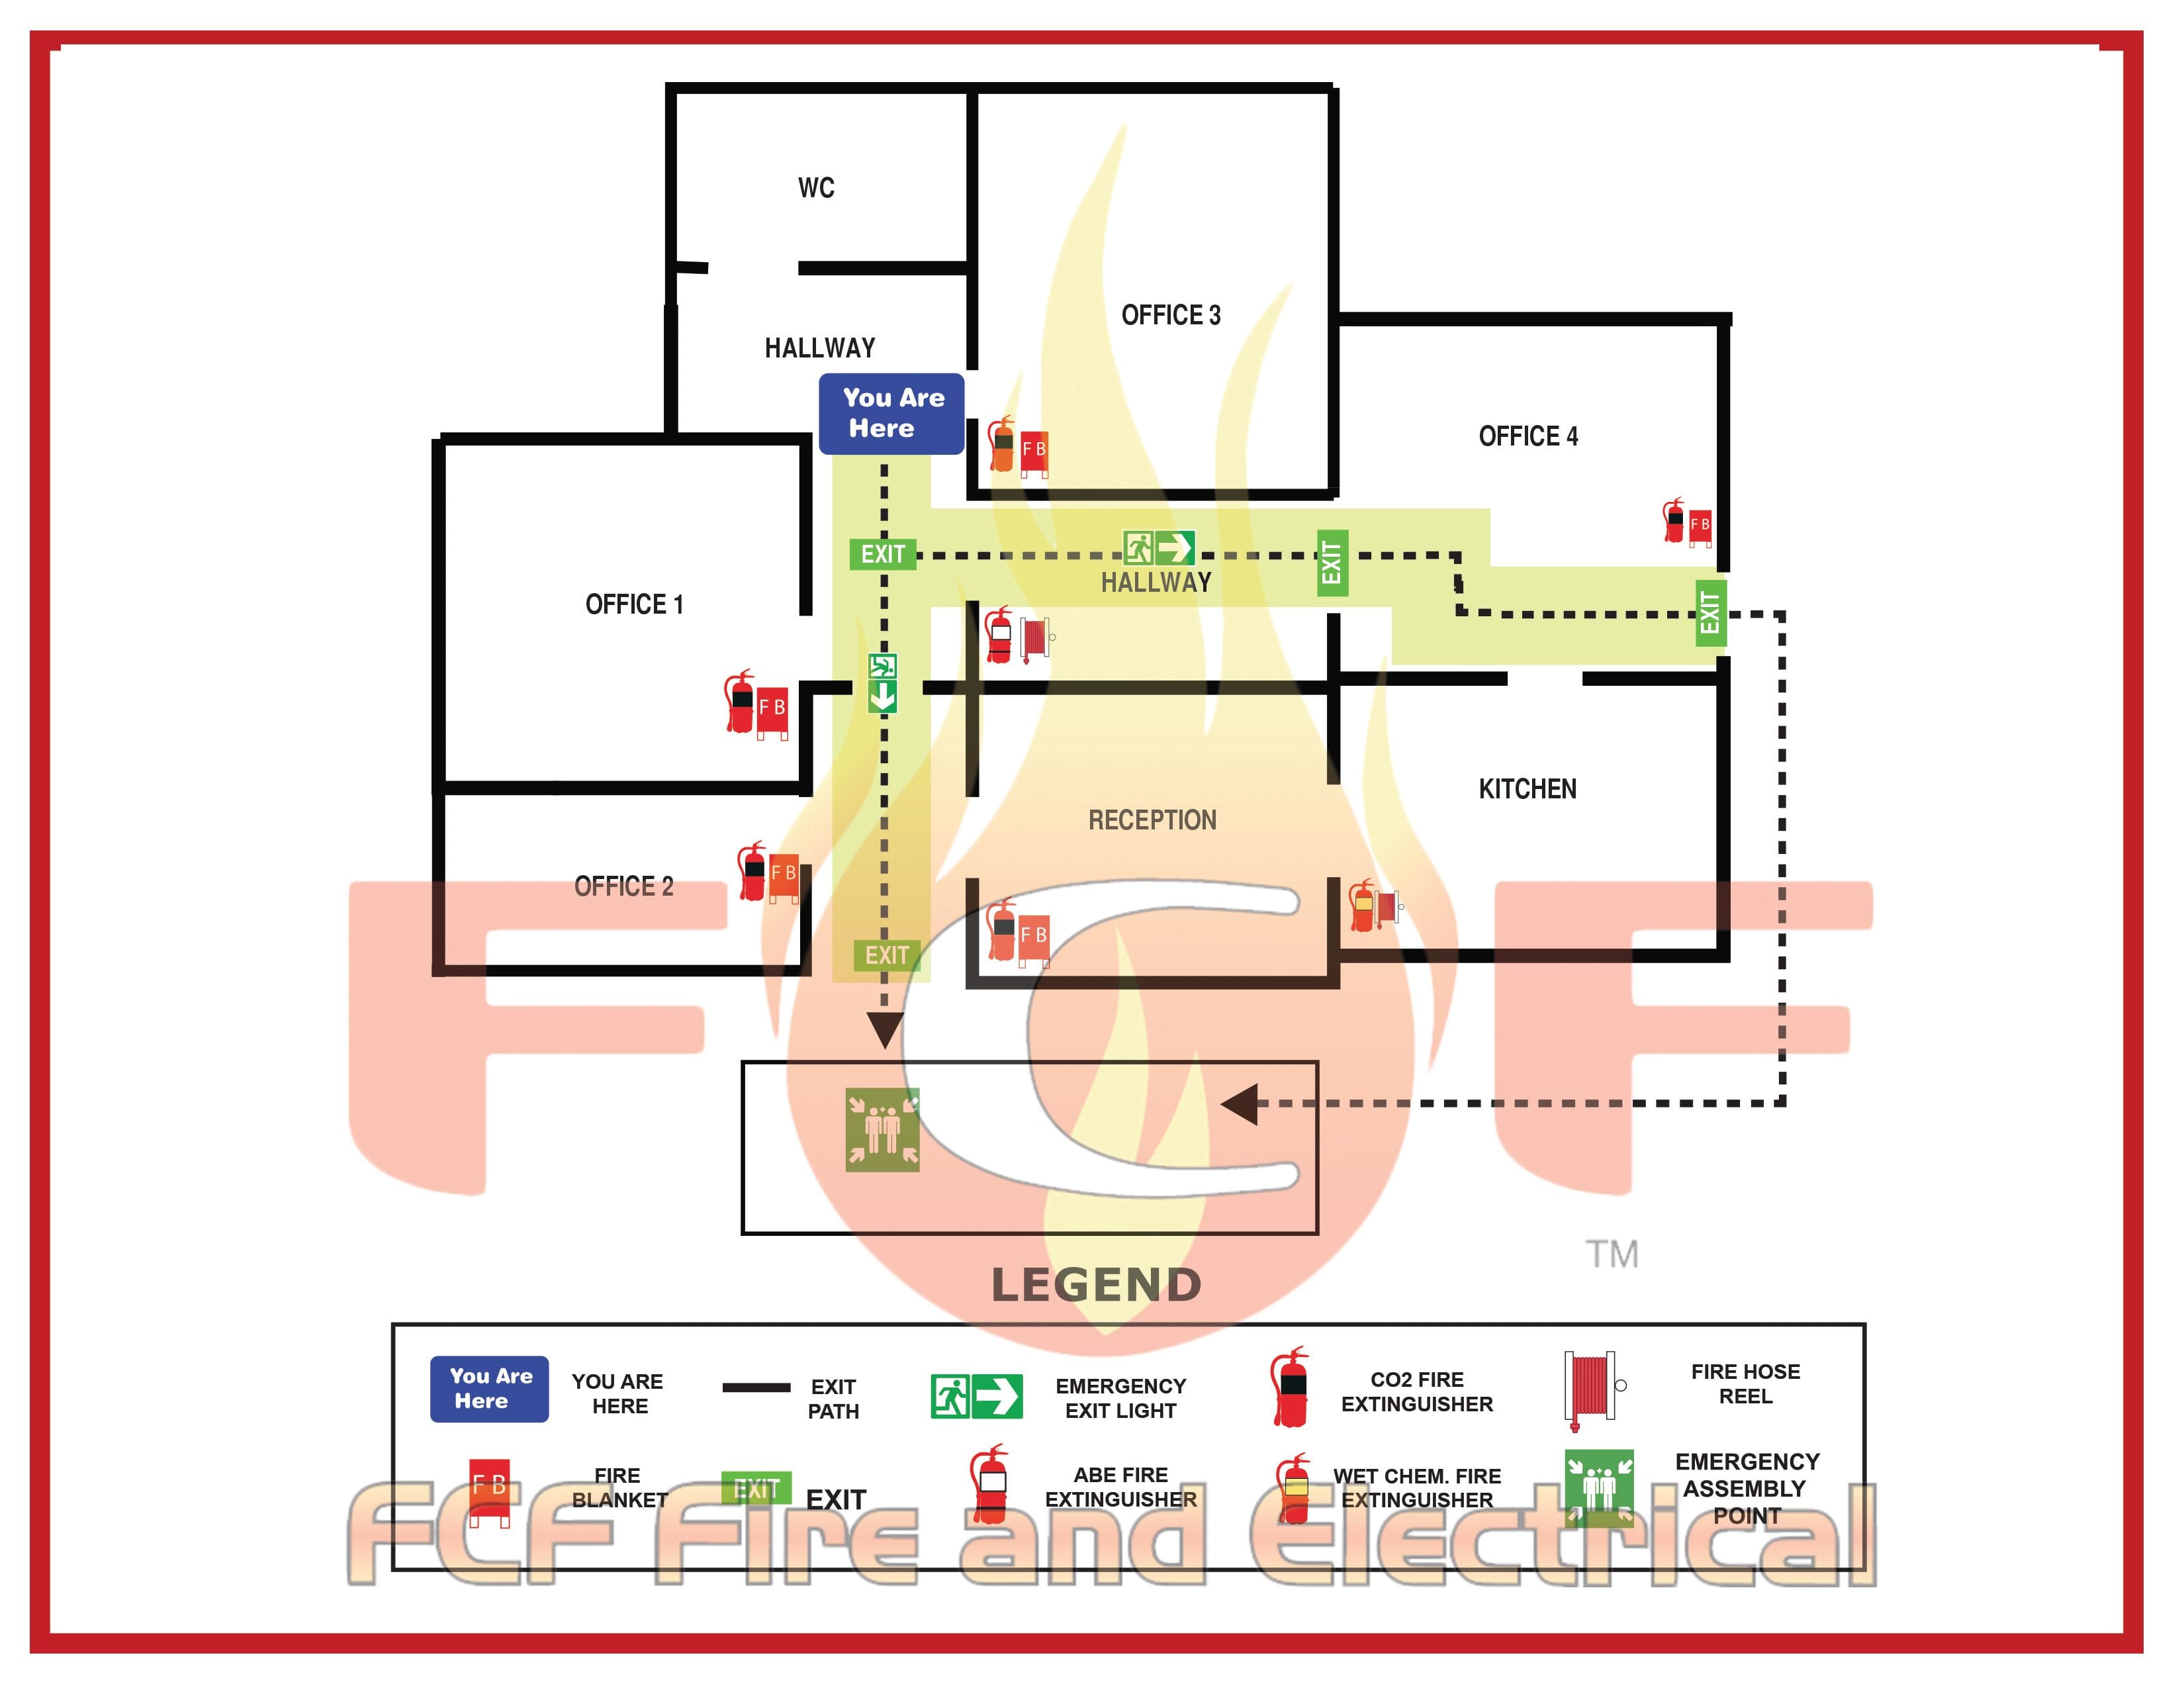
Evacuation Floor Plan

The purpose of the evacuation diagram is to:
- Prepare people prior to an emergency by providing a pictorial representation of the facility and its emergency information.
- Guide people to safety in an emergency
- Identify the location of emergency equipment (alarms, fire extinguishers, fire hose reels, first aid points, warden phones, hydrants, etc)
- Identify the location of emergency and fire exits
- Identify the location of assembly areas, holding and communication points
- Identify communication and emergency contact information
- Identify emergency procedures
- Provide orientation of where you are
Best practices for making a proper evacuation diagram (Fire Evacuation Diagram):
1. Keep it Simple
This is a situation where less detail is much better. The easier and faster that somebody is able to take a look at the diagram and learn what they have to know, the greater. Calm thinking goes out the window during a crisis, and the goal here is to save lives, so only the important elements need to be displayed.
For the diagram to offer immediate clarity during a disastrous occasion, use simple colors to clearly show the architectural format (walls, doors, etc). Highlight important components on the chart (exit areas, fire extinguisher places, etc) in color. These vital components must be shown working with both an easy graphic and a content label.
2. Evacuation Diagrams Should Show These Elements
- The basic layout of the property including walls and doors. Show the outside of the property as well because you need to indicate a marshal or congregation area for people to go to in the event of an emergency.
- The starting point. This is the location of the diagram (and therefore the person reading it). Make a large red dot and label it "You Are Here".
- The compass. Show a basic compass in the corner of the diagram indicating the direction of North with the letter "N".
- Exit points. Highlight the exterior doors and label them as "Exit" on your diagram. These exit points need to be clear and accessible at all times. They also should not be locked in a way that requires a key to open them when exiting.
- The marshall area. This is the place where evacuees should meet. It should be a safe distance away from the building to provide adequate protection from fire and any onsite hazards such as chemicals or explosive materials. Draw the marshall area on your diagram using a red circle and label it "Marshal Area".
- Fire extinguishers. Use a small fire extinguisher icon and the label "Fire Extinguisher" to show the location of all the extinguishers on your diagram. If there's a fire fighting station on the property, show that as well and label it "Fire Station".
- First aid kits and stations. Use a blue cross and the appropriate labels to show the location of first aid kits and first aid rooms.
- Other important elements. You can also show certain things such as eyewash stations, stairways that lead out of the building, and other safety stations that might be specific to your industry or business.
3. Display the Evacuation Diagrams in High Traffic Areas
For an evacuation diagram to be handy, it has to be noticeable. Display it on a blank wall in an uncomplicated view of the surrounding region. If you have numerous diagrams, make an alternative diagram for every display spot with a distinctive "You are Here" element. Draw floor plans for individual rooms or for entire floors of your building.
It is also a great idea to orient each diagram (turn it) in a manner that makes good sense to the display area so users may easily find exactly where they are and how they'll exit.
4. Evacuation Floor Plan: Tools for Creating Evacuation Diagrams
The simplest way to create an evacuation map is using paper and pen. If you undertake this, use fine-tipped markers for the colored components. You can also make use of the design tools in an application like Microsoft Word or a drawing program like Photoshop.
An ordinary photo frame is going to do for displaying the diagrams, and you can always buy picture frames that look professional and clean.
The development of an evacuation diagrams will be in accordance with Australian Standard 3745-2010 Planning for Emergencies in Facilities. It is a requirement that evacuation diagrams are reviewed every five years.

)
)
)
)
)
)
)
)
)
)
)
)
)
)
)
)
)
)
)
)
)
)
)
)
)
)
)
)


